Visual Data Factory Documentation
1. Overview
Visual Data Factory is a visual tool for modeling databases and generating large amounts of realistic and relational test data. It is designed for developers, testers, students, and teams who need to quickly create and populate a database with fake data for their projects, without writing scripts by hand.
Note: For now we only support MongoDB data generation but we plan to support SQL too.
2. Entity
An Entity represents a collection (in MongoDB) or a table (in SQL). Entities are the core building blocks of your data model. Each entity has fields (attributes) and can be related to other entities.
2.1 How to Create an Entity?
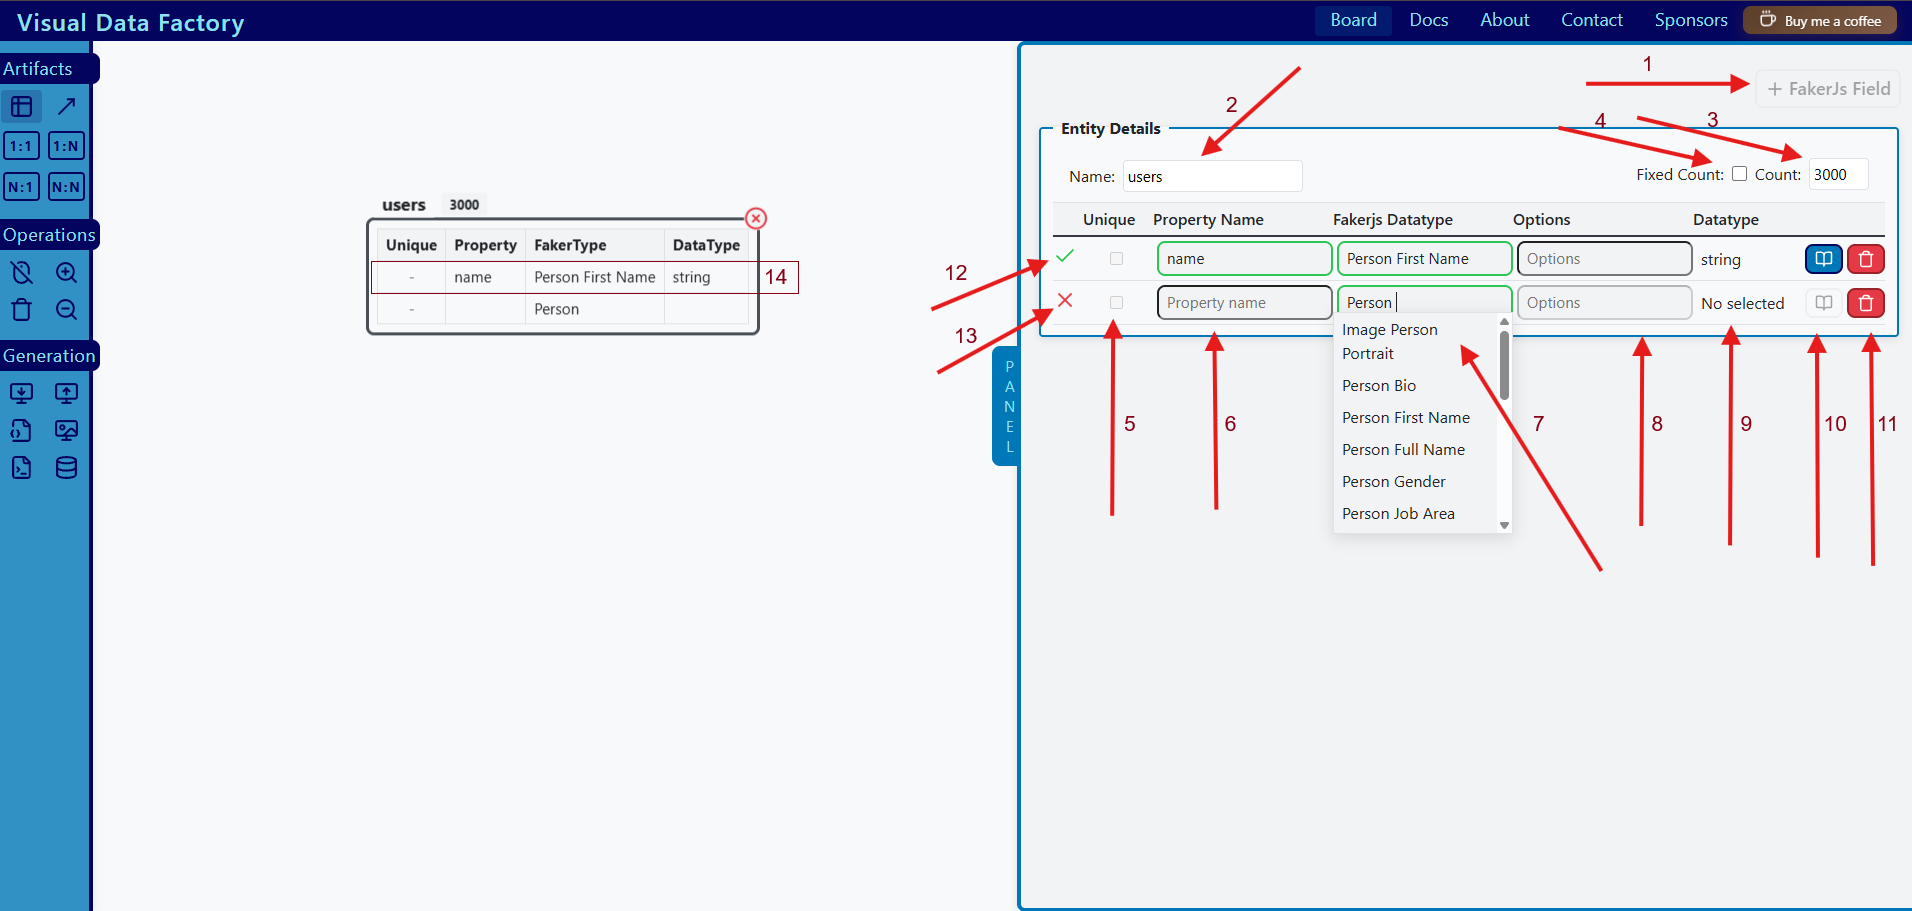
Select the entity icon on the Toolbar Menu at your left side (arrow 1). Once it is selected, you can click on any place in the board and a box will appear with a default name “Entity_1” and a “No data to show” message (arrow 2).

To fill out an entity, you need to select it by clicking on it and then click on the “Panel” button (arrow 2 and 3), or you can simply double-click on the entity. This will open an empty Entity Form. The open entity form has an input “Name” (arrow 4), an input “Fixed Count” (arrow 5), an input “Count” (arrow 6), and a button “FakerJs Field” that allows you to create fields (arrow 7).
2.2 How to Fill Out the Entity Form?
To create an entity field you need to click on FakerJs Field (arrow 1). You can add only 1 field at a time; the application will allow you to add another once all the fields are valid, including the current field.
2.2.1 Entity Name
You need to enter a valid entity name (arrow 2).
2.2.2 Count
This input is used to determine how many documents you want to create from this entity (arrow 3). The number of documents to generate ranges from 1 to 3000 (a random number).
2.2.3 Fixed Count
If checked, this means that the number of documents to generate based on this entity will be exactly the specified count (e.g., 3000) (arrow 4).
2.2.4 Property Name
The name that you want to assign to the property. Must be a valid identifier (arrow 6).
2.2.5 Fakerjs Datatype
This is one of the most important inputs and defines the kind of data we want to generate (arrow 7). The options shown here are the modules available on the faker.js site.
2.2.6 Options
Here we allow the user to pass valid options that the selected faker.js module supports. By default, we use the default module options (arrow 8).
2.2.7 Unique
Fields can be marked as unique if their cardinality matches or exceeds the entity count (arrow 5). For example:
faker.helpers.arrayElement(["red", "green", "blue"]);→ 3 possible outcomes
- If the counter is 3000, the field using this faker.js module with these options cannot be marked as unique.
- If the counter is 3 or less, the field using this faker.js module with these options can be marked as unique.
2.2.8 Datatype
The datatype depends on the Fakerjs Datatype Selected + its Options. We cannot manipulate the datatype directly (arrow 9).
2.2.9 Examples
This button shows some examples given the selected Fakerjs Datatype (arrow 10).
2.2.10 Delete
This button allows you to delete an Entity Field (arrow 11).
2.3 How to Remove an Entity?
To remove an entity, select it and a remove icon will appear. If you click on it, the entity will be removed. Take into account that if you remove an entity, all relationships associated with it will also be removed.
3. Extensions
An Extension allows you to embed one entity inside another. For example, if a user has an array of addresses, you can create an “Addresses” entity and embed it into the Users entity. You can specify how many addresses to generate for each user.
3.1 How to Extend an Entity?
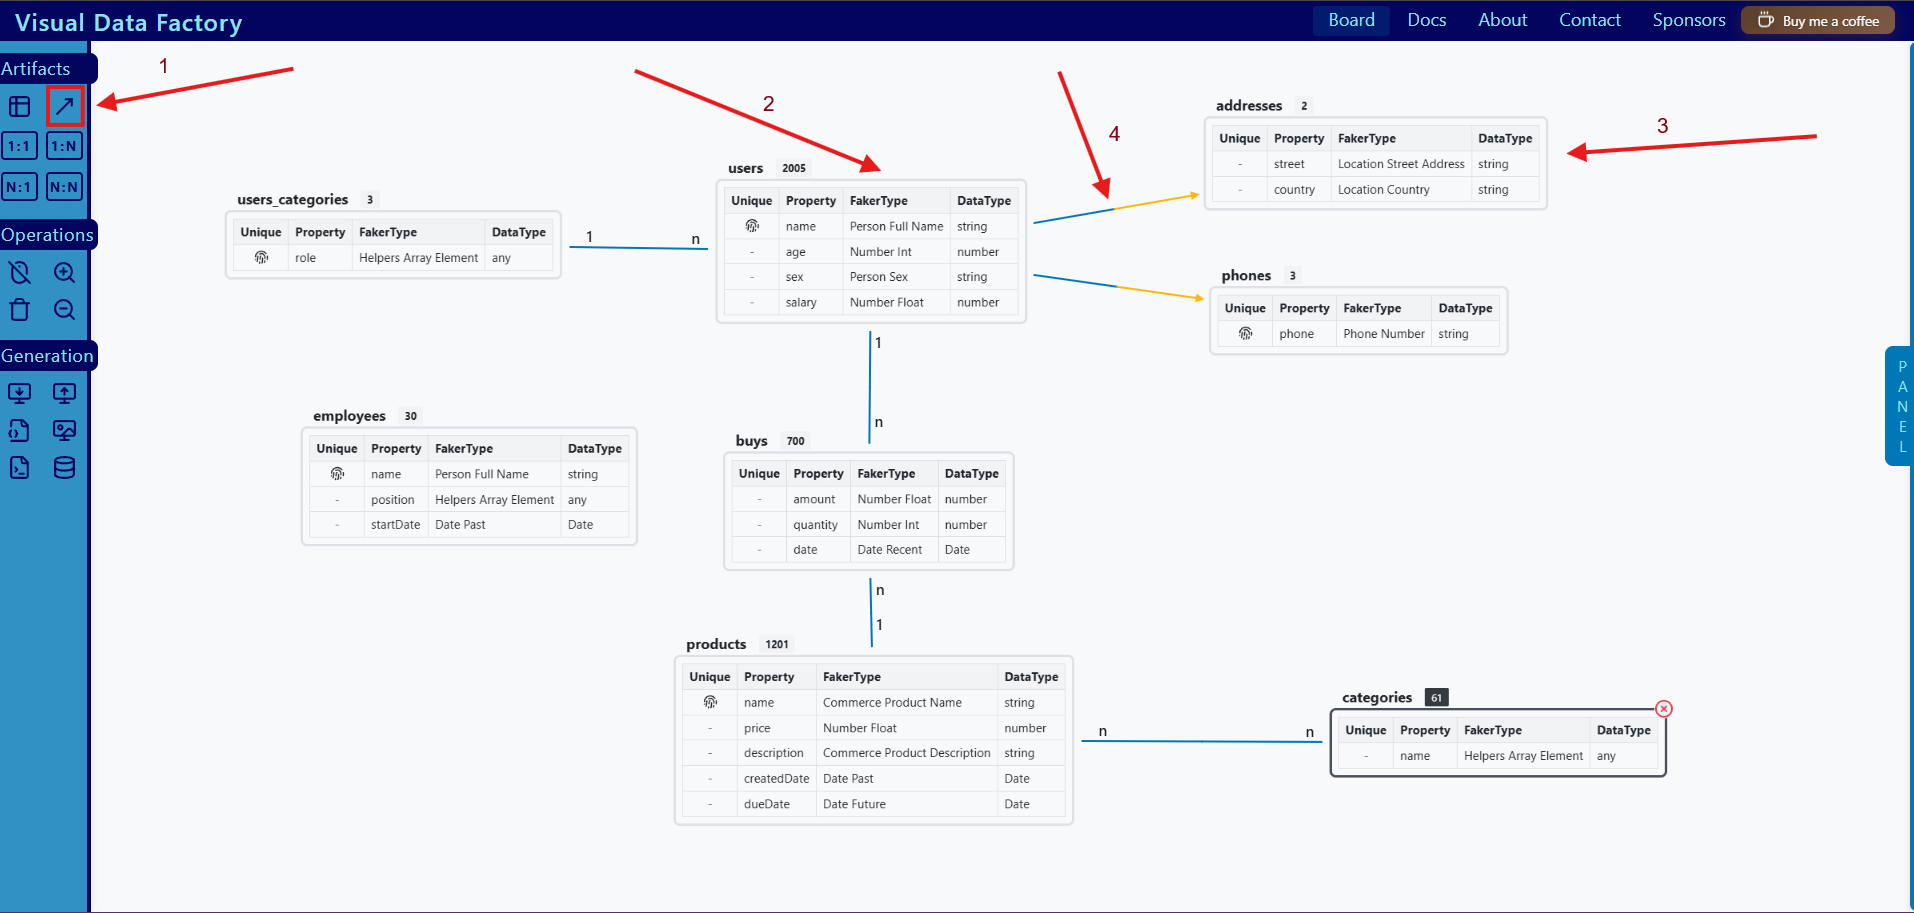
To extend an entity, select the Extension icon on the Toolbar Menu on your left side (arrow 1). Once selected, click on the entity you want to extend (known as the parent entity) (arrow 2) and then click on the entity that will be the extension (known as the child entity) (arrow 3). After the last click, an arrow will appear indicating the extension (arrow 4).
3.2 How the Entity is Going to be Extended?
The idea of extensions is to provide the ability for a document to embed data. If the child entity has a count of 1, it becomes an embedded object; if it has more than 1, it becomes an array of objects.
3.2.1 Example Result
{
  "name": "John Doe",
  "email": "[email protected]",
  "addresses": [
    {
      "street": "123 Main St",
      "city": "Springfield",
      "zip": "12345",
      "country": "USA"
    },
    {
      "street": "456 Oak Ave",
      "city": "Shelbyville",
      "zip": "67890",
      "country": "USA"
    }
  ]
}
3.3 How to Remove an Extension?
To remove an extension, select the extension line and click on the remove icon.
3.4 Rules of Extensions
- An entity can have many extensions.
- Each extension belongs to only one entity.
- An Extension Entity Child cannot be connected directly to a relationship.
4. Relationships
Relationships define how entities are connected between them. Visual Data Factory supports 1:1, 1:N, N:1, and N:N. Relationships are created visually on the board. You will be able to add and remove them as necessary, but you cannot modify the foreign key name. The reference name will be the name of the foreign entity concatenated with “_id”, for example “products_id”.
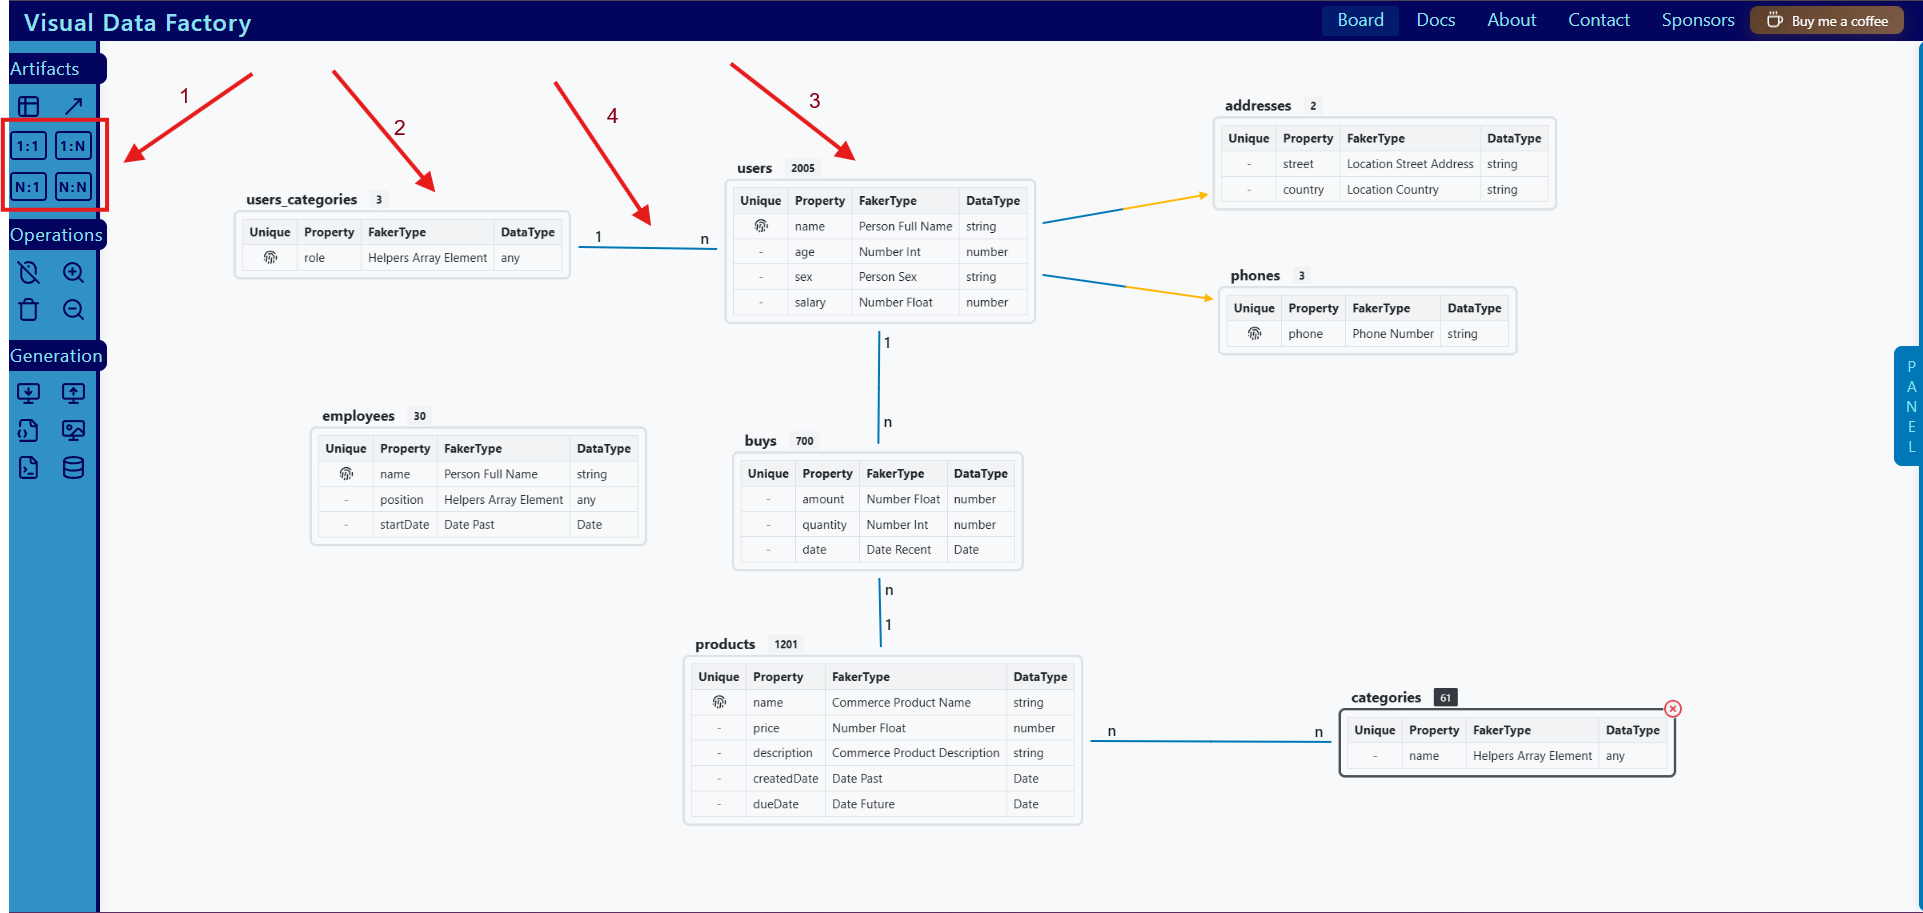
4.1 How to Create a Relationship Between 2 Entities?
Select the desired relationship on the Toolbar Menu (arrow 1), select an entity that you want to connect (arrow 2), and then select the other entity that you want to connect (arrow 3). After this last entity is selected, a relationship line will appear (arrow 4).
4.2 How to Remove a Relationship?
To remove a relationship, select the relationship line and click on the remove icon.
5. Operations
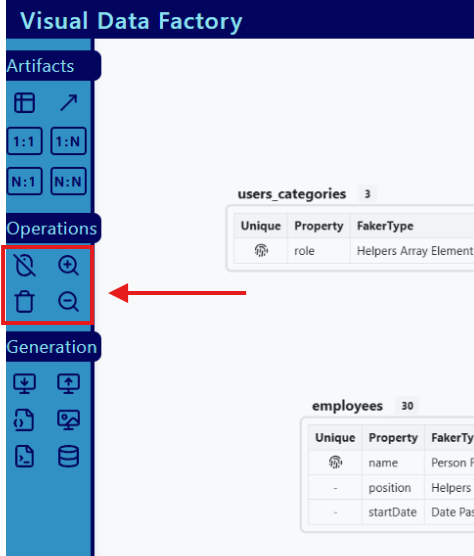
There are some operations that are allowed:
- Stop board from pan
- Delete all shapes from board
- Increase and decrease the Entity Size
You only need to select the desired operation to perform on the Toolbar Menu.
6. Save and Upload Project
6.1 Save Project
If you want to save a project, click on the “Save Project” icon in the Generation section of the Toolbar Menu.
6.2 Upload Project
If you want to upload a project, click on the “Upload Project” icon in the Generation section of the Toolbar Menu. Take into account that if you upload any saved project, you will lose your current progress.
7. Generate JSON
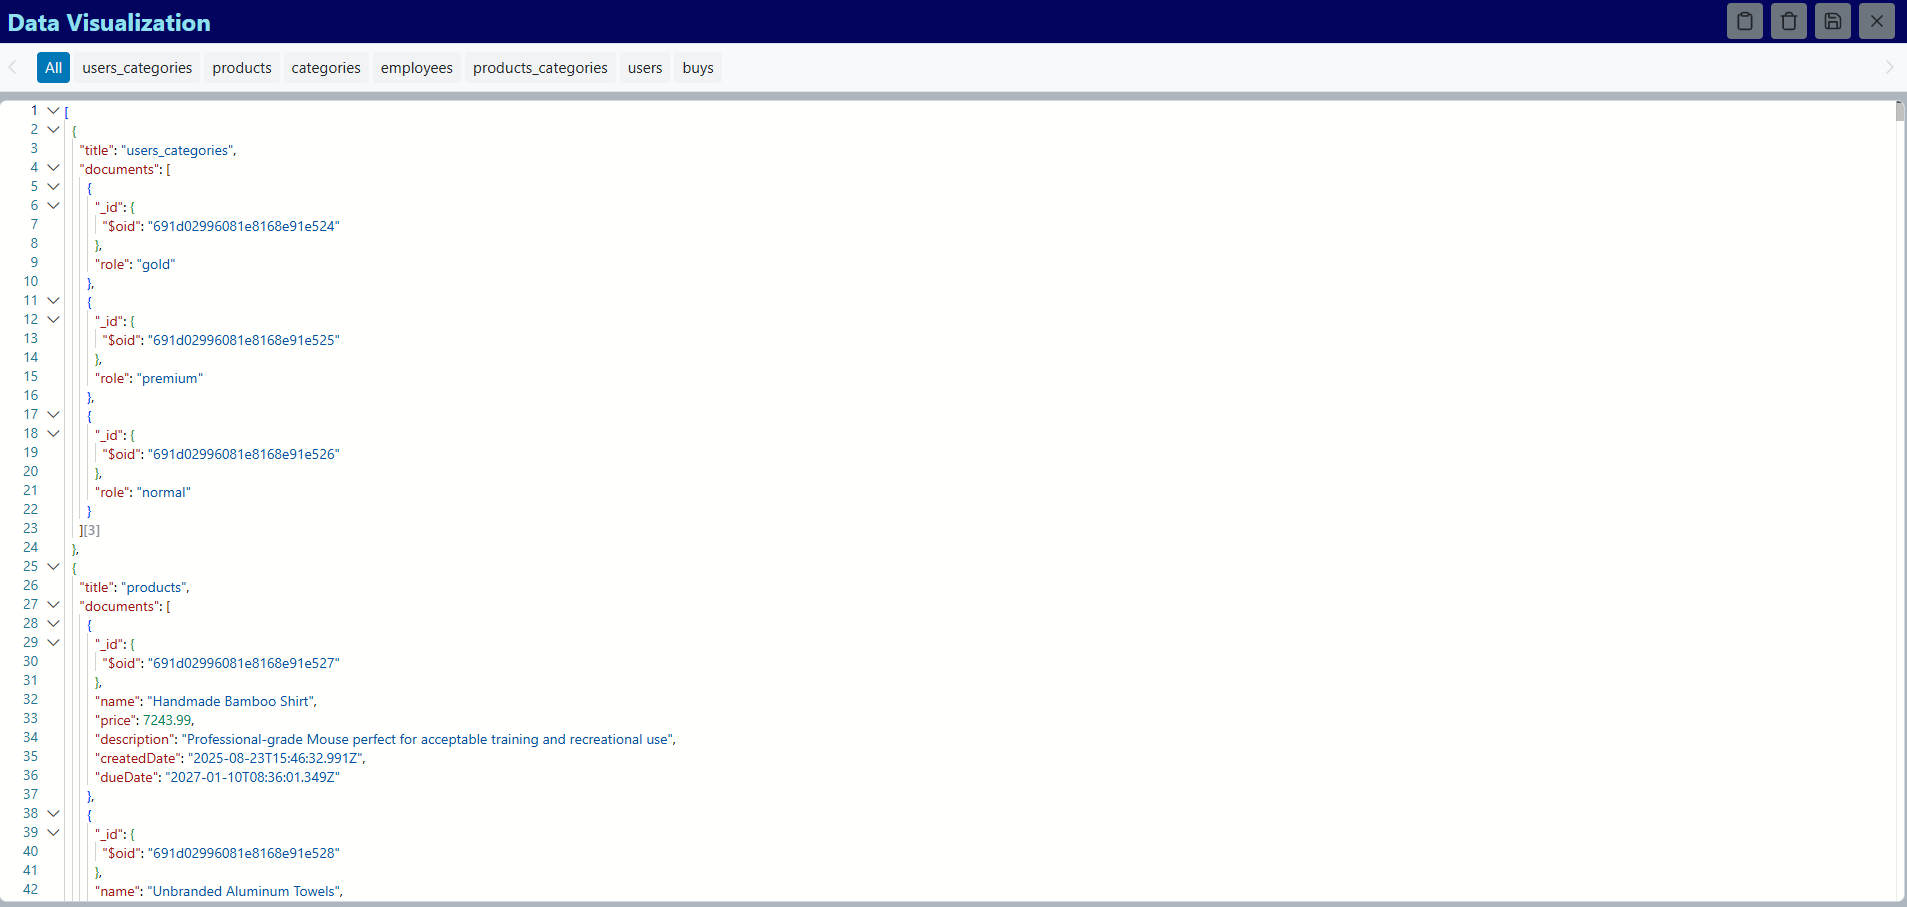
Once you are done with your diagram and want to generate the data, go to the Generation section in the Toolbar Menu and click on “Generate Json”. You will need to confirm that you want to generate the JSON. After confirming the generation, if the application is able to generate the data, the “Visualizer” will open and you will be able to see the generated data.
8. Populate Database
Once you have generated the JSON, you will be able to populate a MongoDB database. You can select any of the following methods:
8.1 Copy/Paste Data Directly from Visualizer
In this case, you only need to click on the Copy icon in the Visualizer Header.
8.2 Populate Database Using Script
This option offers you the ability to generate the collections and documents without providing any confidential information to Visual Data Factory. The idea is to provide you with a Node.js script that runs on your machine.
To populate your collections using a script, click on the “Populate Collections using script” icon in the Generation section of the Toolbar Menu.
8.3 Populate Database Using UI
This is the easy-to-go option. The idea is to populate the collections through Visual Data Factory.
To populate your collections through Visual Data Factory, click on the “Populate Collections” icon in the Generation section of the Toolbar Menu.